Updates
** Map of Locations ** has been updated to Mar 3, 2026!
**NEW** I am now adding a link to GAIA GPS for recent posts.-
Recent Posts
Categories
Participants
Notes:
— For an inline photo, click on it to display a larger image. Then [back] on your browser to return to the page.
— Some links that are marked out, suggesting they are “dead links”, will work. They go to a site that the Broken Links Finder cannot access, but -you- can.Comments or Questions?
-
To date: .
- 1
- 537
- 14,838
- 119,378
- 47,273
Category Archives: Jemez
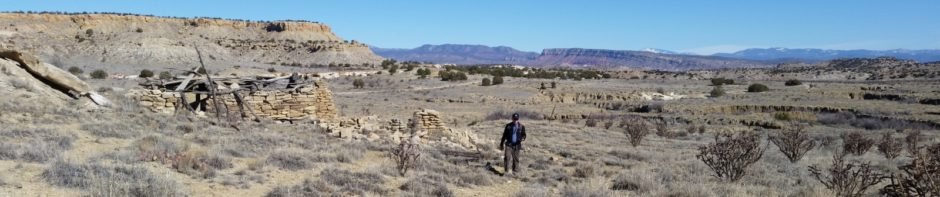
Cebolla Canyon Hike – 06/29/2014
An after-the-fact post of this hike that Jay and I made before I started the BLOG. One of our early hikes, checking out trails in the Jemez Mountains. Jay here: I had done this hike with a group way back … Continue reading
Moon-Rito Peñas Negras Hike – 06/25/2017
This is our second off-the-beaten-path hike, which I planned using GoogleEarth and topographic resources (such as Lists of John’s Interactive Map and the US Topo app on my Android tablet & phone). The goal here was to hike up Moon Canyon, then … Continue reading
Telephone Canyon Plus Hike – 06/11/2017
Having exploited all the trail for which I could find others’ tracks, I spent some time on GoogleEarth and top maps (for example, Lists of John’s Interactive Map) to develop a plan to hike up Telephone Canyon, descend into Calaveras … Continue reading
Pony Canyon Hike – 06/04/2017
We returned again to the Jemez Mountains, to explore the canyons north of Fenton Lake. The Drive In This time we drove up FR 378, to the head of the set of canyons that branch off of Calaveras Canyon – … Continue reading
Calaveras Canyon Hike – 05/28/2017
‘Tis summer, and the Jemez Mountains offer temperatures that are not so high as elsewhere near Albuquerque. So we’ve returned again to the area of other recent hikes, Oat-Hay Canyon and Barley Canyon, to another of the numerous canyons above … Continue reading
Barley Canyon Hike – 05/07/2017
Seeking trails new to us, we came upon ASCHG’s Barley Canyon hike. The Jemez Mountains are better this time of year, a higher elevation than around Albuquerque and generally nicely wooded forest. ‘Tis a bit distant from Albuquerque (90+ miles … Continue reading
Kasha-Katuwe Hike – 04/24/2017
Time for another visit to Kasha-Katuwe Tent Rocks National Monument. Pat & I visited this on one of our first visits to New Mexico together, back before it became a national monument; that is a memorable time for us both. … Continue reading
Oat Canyon to Hay Canyon Hike – 04/23/2017
Off to the Jemez now that weather is getting warm. Opted today for an ASCHG hike, Oat-Hay Canyons to Bottom Short Hike. The Drive In To get to the trailhead in Cebolla Canyon, go west out of on NM 126, … Continue reading
Puye Tour – 01/25/2016
This was a day trip out of Albuquerque, with lunch in Santa Fe on the way to Puye. After checking in with the Welcome Center on NM 30, we were directed up to the Visitor’s Center below ruins site. Since … Continue reading
Paliza Canyon & Goblin Colony Hike – 7/19/2015
One of our early trips into the Jemez. The Hike This hike is an easy one, leaving the parking area on a two-track, past some strip mines and what looks like the ruins of a one-room Pueblo structure. We … Continue reading